Safari APNs setup
Note This documentation describes how to implement Safari APNs support.
As of macOS Ventura (13.0), Safari implements the same Web Push Protocol other browsers do and do not require any additional configuration from your part.
Standard Web Push notifications are NOT supported on Safari 16 if it is running on macOS Monterey (12.0) or earlier: to support those users, follow this documentation.
More info here.
Most browsers support the Web Push API W3C standard (Chrome, Firefox, etc.), but Apple developed their own push notification system. It means that you need to take on a few additional steps to be able to send push notifications to Safari desktop users.
A dedicated section is available on the dashboard in ⚙️ Settings → Push settings.
What about iOS Web push? Web push is supported as of iOS 16.4. It does not require APNs to be configured. More info is available on our support article.
Defining the website name
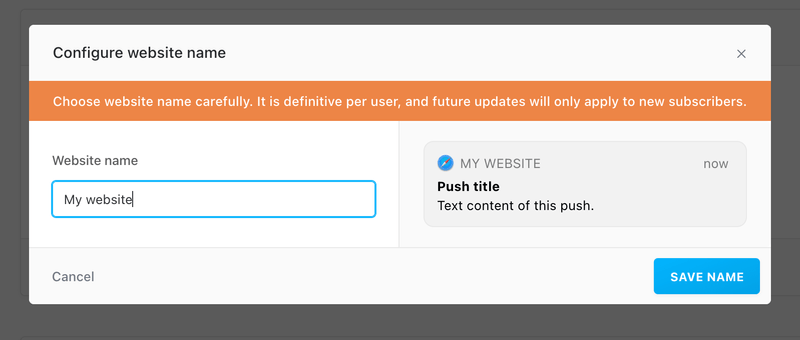
Fill-in the website name that will appear on your Safari push notifications. This will usually be your brand name.
The website name is provided by Batch within the push package requested by Safari when the native authorization prompt is displayed to a user. It is final and cannot be altered for the user afterwards.
Updates will therefore apply only to new subscribers, or current subscribers that reset their status, and subscribe again.
Generating the .p12 certificate
This step requires having an active paid Apple Developper subscription.
Creating a certificate
Batch servers need to have a certificate in order to communicate with Apple Push Notification Services (APNS). This certificate is generated for a unique Website Push ID.
To test your Safari implementation on a specific domain or subdomain, you also need to generate a dedicated Website Push ID and certificate for this domain.
Step 1.
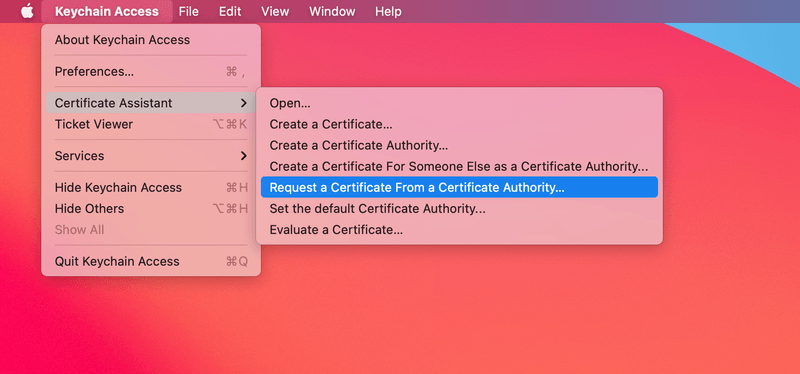
Open your Keychain application on your Mac. In the menu bar, select "Keychain Access" → "Certificate Assistant" → "Request a Certificate From a Certificate Authority…"
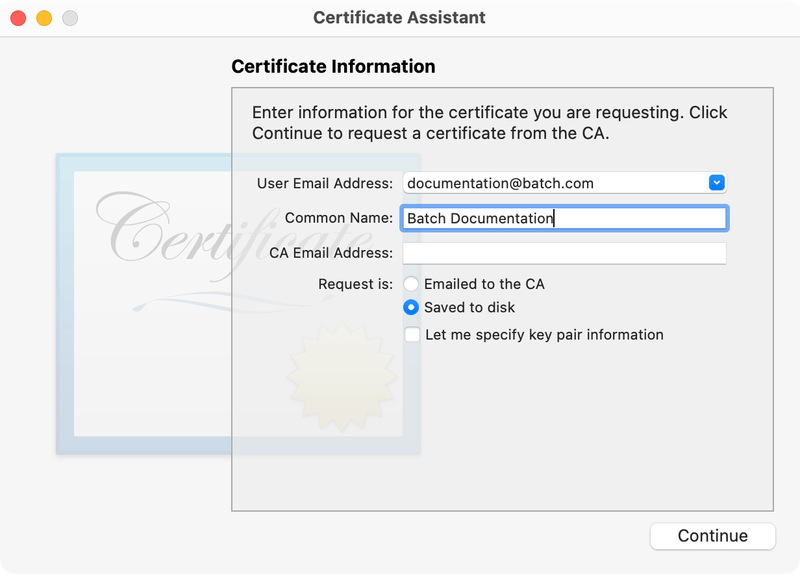
Then, enter your information in the required fields and select "Saved to disk". Save the "CertificateSigningRequest.certSigningRequest" file to your Desktop.
Step 2.
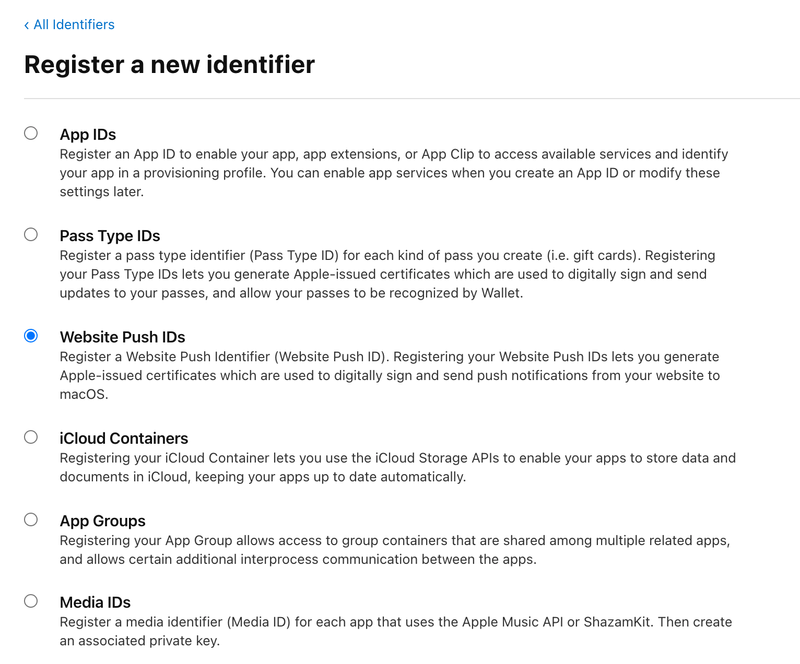
Head to the Apple Developer Member center, open the Identifiers section and create a new Website Push ID (or choose an existing Website Push ID) to configure Push Notifications.
Click continue, and register your Website Push ID.
This will bring you back to your identifiers list. Click on the Website Push ID you just created. Then, click on the Create certificate button.
The next screen will ask us to upload the Certificate Signing Request (CSR), which we have created earlier.
Select "Choose File…" and locate the .certSigningRequest file on your desktop. Finally, select "Continue" and download the generated SSL certificate.
Generating the .p12 file
Now you have the certificate, you need to have it with its key bundled into a .p12 file format.
Step 1.
First, add the certificate to your Keychain by double clicking on the downloaded SSL certificate.
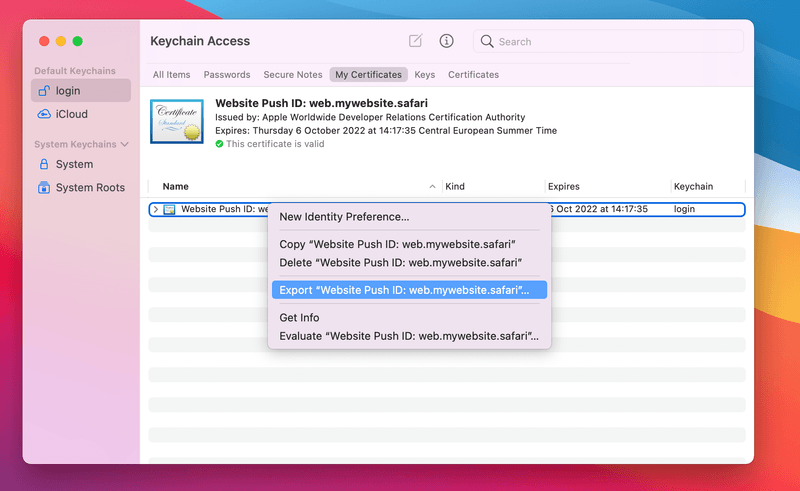
In Keychain Access, pick the default keychain (login on English systems) using the sidebar. Then, click on "My Certificates" and find the certificate you just added. It should start with "Website Push ID:".
Step 2.
Make sure that the certificate is collapsed (the arrow on the left ( > ) should point to the right).
Right-click on the certificate, select "Export Website Push ID:…", and save it as a .p12 file.
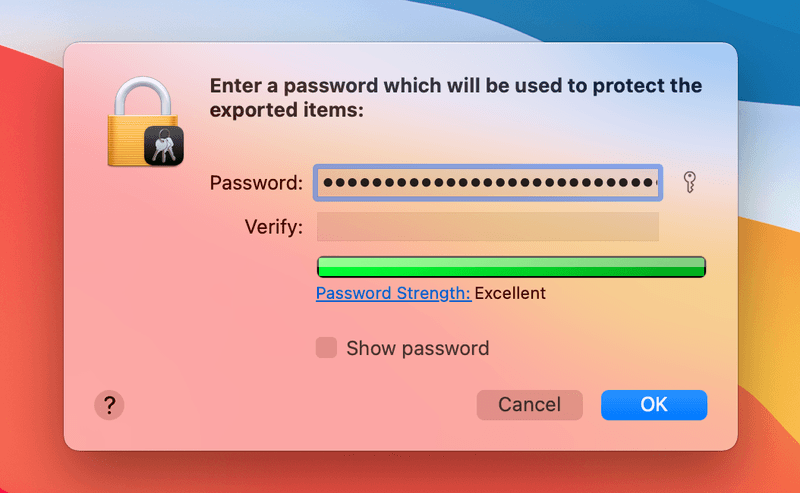
You will be prompted to enter a password which will be used to protect the exported certificate.
The .p12 certificate should now be available in your Downloads.
Adding your allowed domains
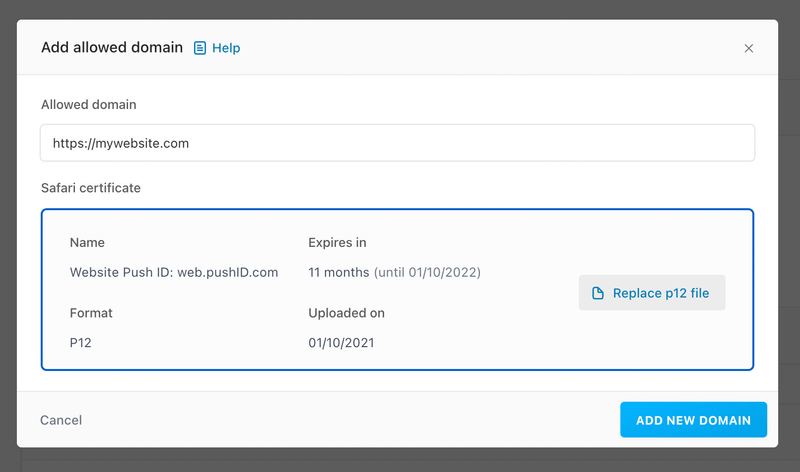
It is required to declare the domains you want to collect opt-ins on. Fill-in the allowed domain field, and upload the p12 certificate generated earlier. If the certificate is protected by a password, you will be asked to enter it.
A certificate must only be only used once for a domain, and not accross several domains or Batch apps, as this can create unexpected behaviors.
If you would like to implement web push on several subdomains, please check the Domains and subdomains management section.
To test your Safari implementation on a specific domain or subdomain, you also to need to add this domain here, and upload a dedicated certificate.

