Timing and delivery
Batch handles all the tricky scheduling and timezones issues for you. Our technology makes sure your users always receive their message when you want them to, whether it's a hot news, a scheduled announcement or a recurring message. Simply choose the time, select a few simple options and forget about it. We’ll take care of the rest.
There are several options to choose from:
- Now: Use it to send your notification as soon as you click the "SEND" button.
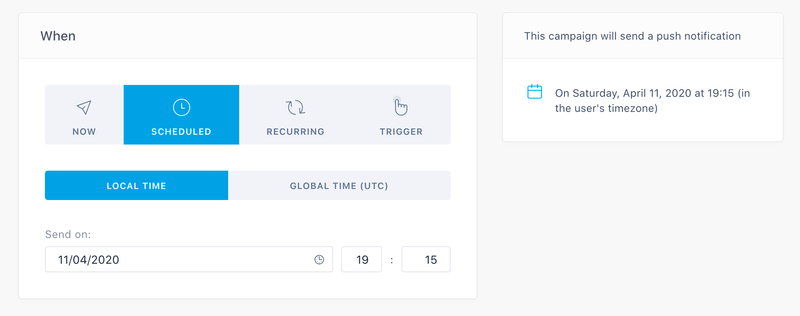
- Scheduled: Select that option to schedule a campaign in the future based on your users' local time or on global time (UTC).
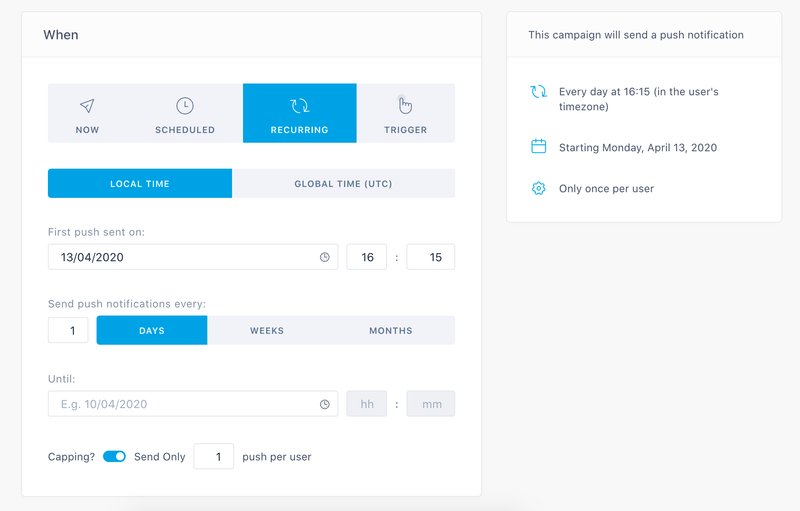
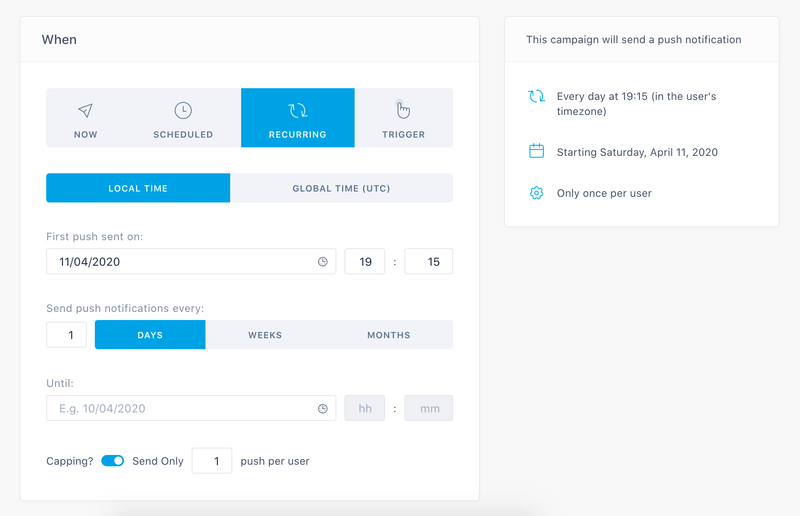
- Recurring: Create push campaigns that repeat at specified intervals based on your users' local time or on global time (UTC). This is handy for long term automated campaigns or expiry alerts.
- Trigger: Trigger campaigns allow you to send push notifications after users installed the app or triggered an action (e.g. add to cart, etc). Use that option for all your abandoned cart and onboarding scenarios.
Now
Send a push notification instantly to your users regardless of their timezone. This is the best option if you work in the media and want to be the first to announce breaking news.
E.g. “Royals beat Mets in Game 1 of World Series, 5-4 in 14 innings. Game 2 is Wednesday night.”
Note that a push notification cannot be stopped after sending. Carefully verify its timing, content and targeting.
Scheduled
The Scheduled option allows you to reach your users at a specific time in the future. You can schedule a push notification based on:
Local time
The Local Time option lets you send a push notification that will be received at the same hour in every country. This ensures that marketing efforts target your users at a uniform time.
When you choose a specific date and time, Batch will send the first notifications at the chosen time starting with users just west of the International Dateline (GMT+12) and each hour afterwards for 24 hours until the conclusion of the campaign.
For example, if your push campaign is scheduled to be sent on Friday, July 19th at 6pm, your American, French and Chinese users will receive it on Friday, July 19th when it's 6pm in their country.
Safety net
If you set a specific date and time and the date/time you've selected has already passed for a particular time-zone, the campaign will not deliver a push to the users within that time-zone unless they are within 30 minutes of the campaign start time.
This safety net will catch any users that might have been missed and deliver the push, though you should avoid setting last-minute campaigns, as they could be delivered at undesired times.
Stopping a push campaign
Stopping a local time based campaign only cancels it for users located in timezones that have not yet reached the scheduled sending time. For example, if the push campaign is scheduled for 2PM (local time) and is canceled at 3PM UTC, a targeted user located in the US (UTC-4) will not receive that campaign.
Global time (UTC)
The Global Time (UTC) option allows you to send a push notification to your users at a specific UTC time regardless of their location.
For example, if your push campaign is scheduled to be sent on Friday, July 19th at 6pm global time (UTC), your users will receive it:
- At 2PM in the US (UTC -4)
- At 8PM in France (UTC +2)
- At 2AM on July 20th in China (UTC +8)
Note that a global time (UTC) push notification cannot be stopped after sending. Carefully verify its timing, content and targeting.
Recurring
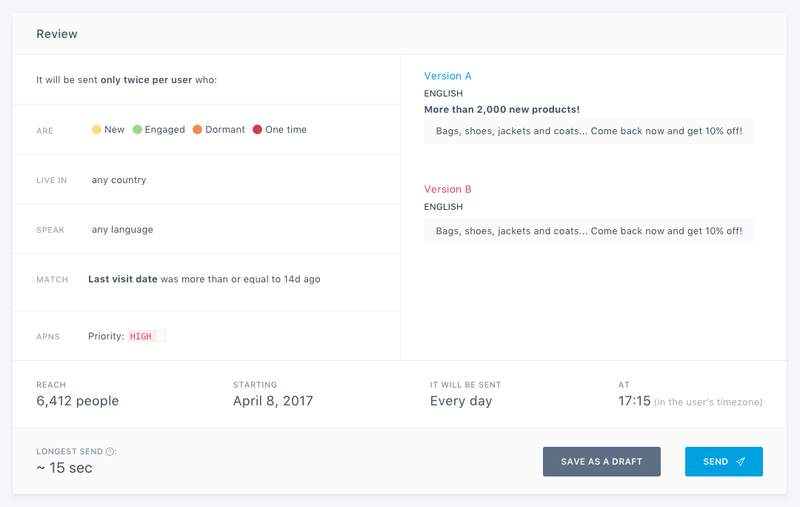
You can create push campaigns that repeat at specified intervals based on your users' local time or on global time (UTC). You can also use a capping to limit the number of times users receive a recurring push notification.
Depending on the recurrency you choose, you can send two different types of notifications:
Retention notifications
Sent every week/month to your inactive users. You can either target specific Smart Segments or use the Last visit date native attribute.
You can send a notification every weekend to the users in the Dormant segment, with a capping of 3 to make sure you don't overpush them.
Onboarding notifications
Sent automatically at a specific moment, depending on:
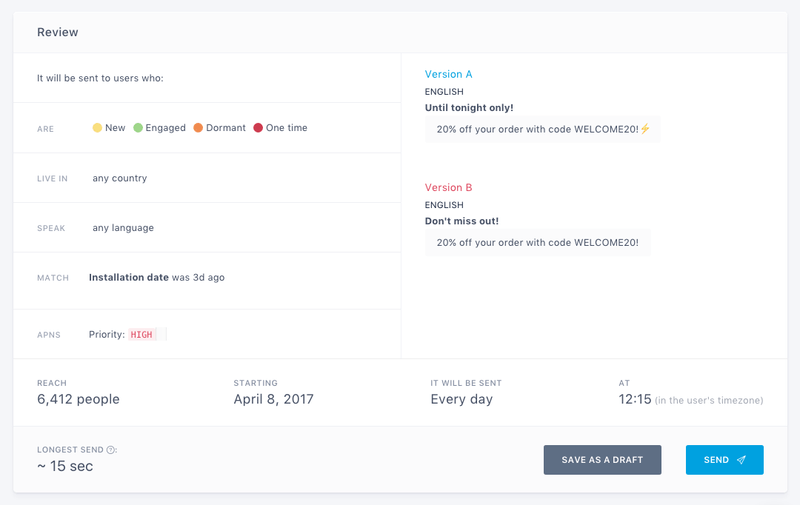
- The installation date: Allows you to create a complete onboarding flow with notifications sent on day 1, 3, 7 after the install.
- The last visit date: Recommended if you want to push users who are becoming dormant (e.g. 10 days after the last visit).
- A custom attribute: To create push scenarios based on custom data. Example: Automatically push users who haven't made a purchase in 20 days.
Onboarding notifications should be sent everyday, with a capping of 1. This will make sure the notification is sent at the right moment for each user, and only once. Please note that your campaign capping will not work if you target the Imported segment.
Frequency capping: We recommend you ser a global frequency capping if you want to limit the number of notifications a device can receive in a customisable time frame.
Trigger
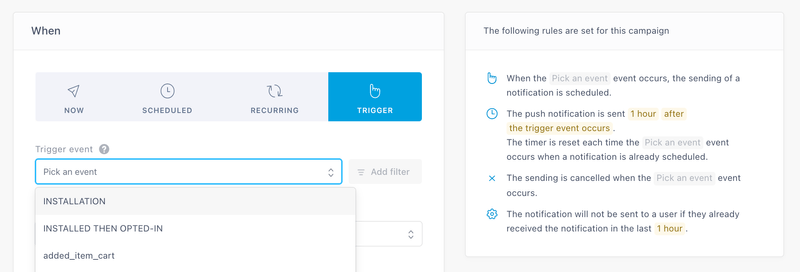
The trigger option enables you to send a notification from one minute to several days after users have installed the app or triggered an action in the app.
Trigger campaigns are useful to manage a wide variety of use cases, from simple welcome notifications sent shortly after users install the app to advanced abandoned cart alerts.
Understanding How User Journeys Work
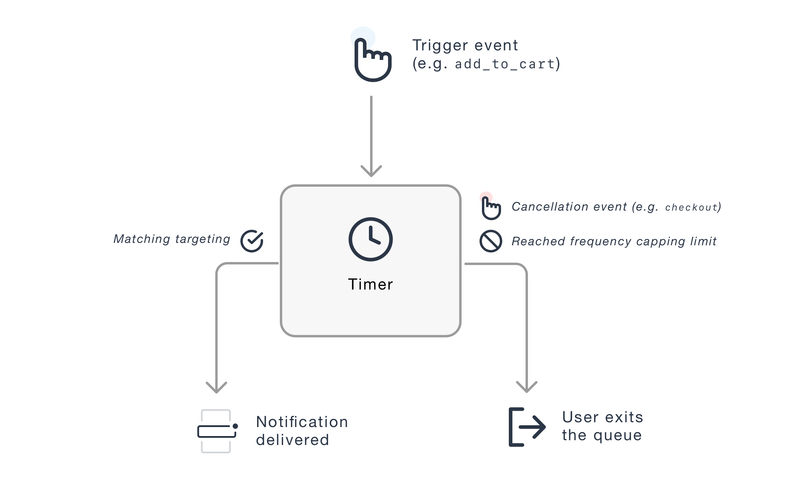
To enter the user journey and receive a push notification from a trigger campaign, users need to:
- Trigger: Trigger the event specified in the campaign (e.g. add to cart). Users immediately exit the user journey when they trigger the cancellation event (e.g. checkout).
- Timer: Wait until the timer set in the campaign is finished. The timer will be reset if users perform again the trigger action (Unless the multi-trigger mode is activated).
- Targeting: Finally, match the targeting set in your campaign when the timer is finished.
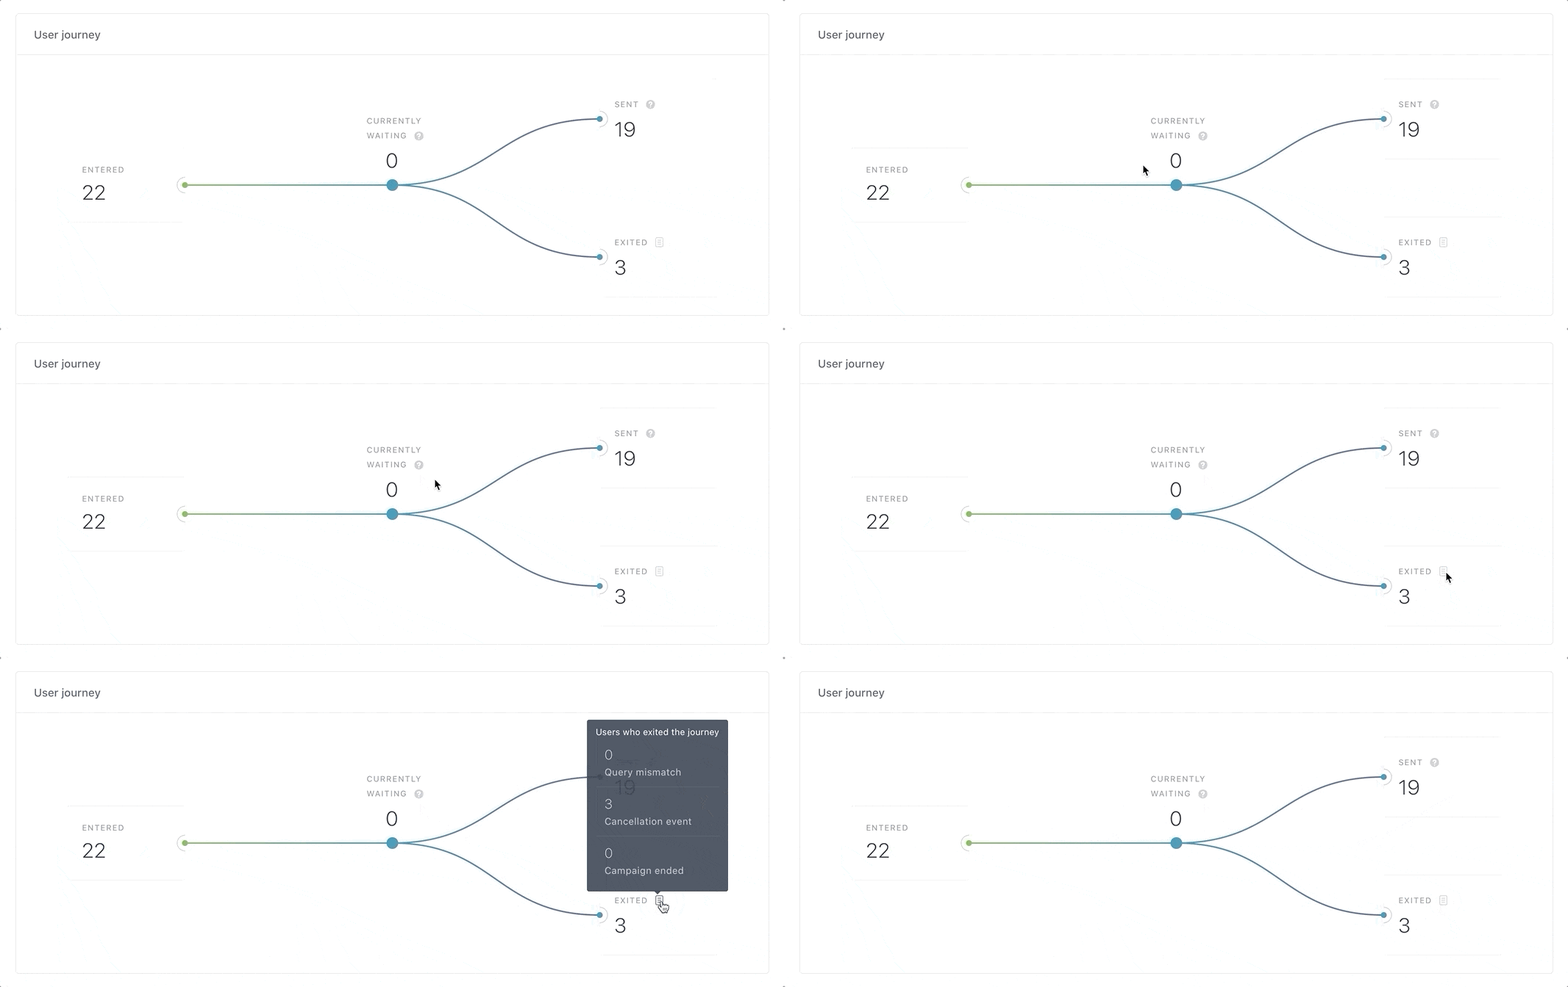
Users may enter the user journey again after receiving a push notification if they trigger the right event later. They will receive another notification depending on the frequency capping limit and the grace period set in the campaign.
You can see how many users are still waiting for the timer to finish or why they exited the user journey from the campaign analytics:
Setting Up a Trigger Campaign
Choosing a Trigger
The trigger action is the most important part of your campaign. Some trigger events are available by default, or you can use custom events.
Installation
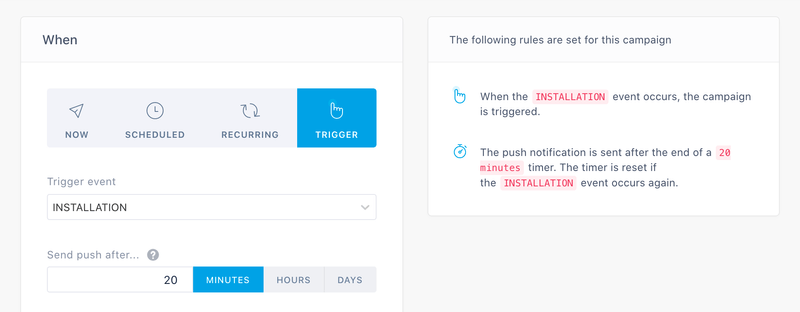
The "Installation" trigger is available by default on iOS and Android campaigns. Users trigger it when they open the app for the first time.
Important note: Use the “Installation” trigger only for campaigns without any additional targeting conditions (e.g. “Country” = “UK” or “Has custom user ID” = “false”). As user data might not be saved on Batch side yet when the “Installation” trigger occurs, users might not enter the journey of the campaign.
Installed then opted-in
The "Installed then opted-in" trigger is available by default on iOS and Android campaigns. Users trigger it when they opt-in to push notifications within 24 hours after they opened the app for the first time.
The Installation date is attached to the native event "Installed then opted-in", you can use it to define the Push timing (see below).
Subscription
The « Subscription » trigger is available by default on web push campaigns starting with version 3 of the Web SDK. Users trigger is when they opt-in to push notifications on your website.
Important note: Use the “Subscription” trigger only for campaigns without any additional targeting conditions (e.g. “Country” = “UK” or “Has custom user ID” = “false”). As user data might not be saved on Batch side yet when the “Subscrption” trigger occurs, users might not enter the journey of the campaign.
Custom Events
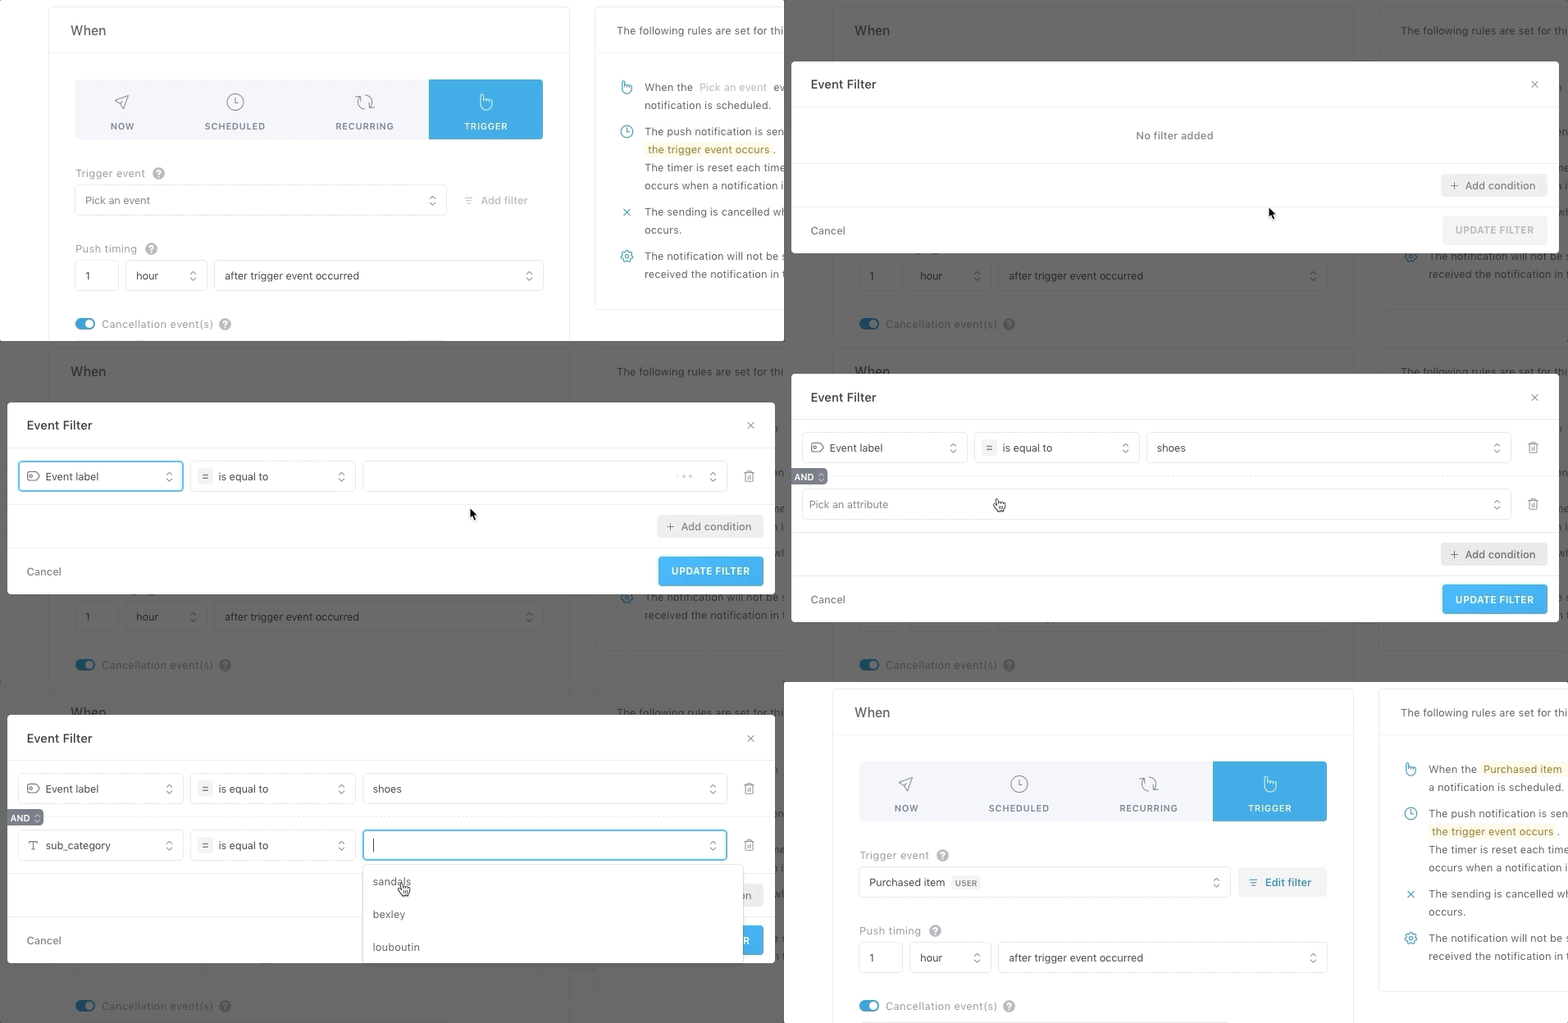
You can choose any events that have been tagged in your app during the integration of the SDK (see more here). You can also apply filters to your event based on any additional data that is attached to it (Label, Attributes, Tag collection) if you want to trigger the notification on a specific action.
Setting the Timer
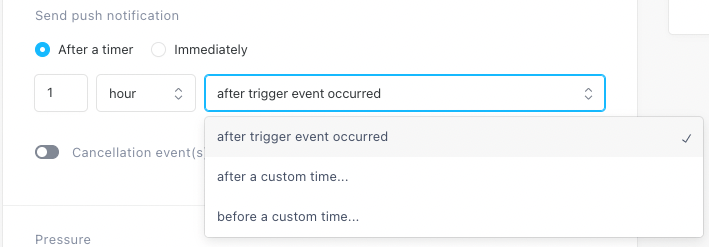
The push timing can be set to « Immediately » meaning the push would be sent right after the trigger event is tracked or it can be based on a timer. The timer defines the time interval in minutes, hours or days to wait for receiving a notification. Batch will wait this amount of time from the chosen trigger date which can be either the date of the event or a custom date attached to the event (ex: send a push notification 1h before or after a said date).
The minimum push timing is 1 minute and maximum push timing is 30 days.
Cancellation Event
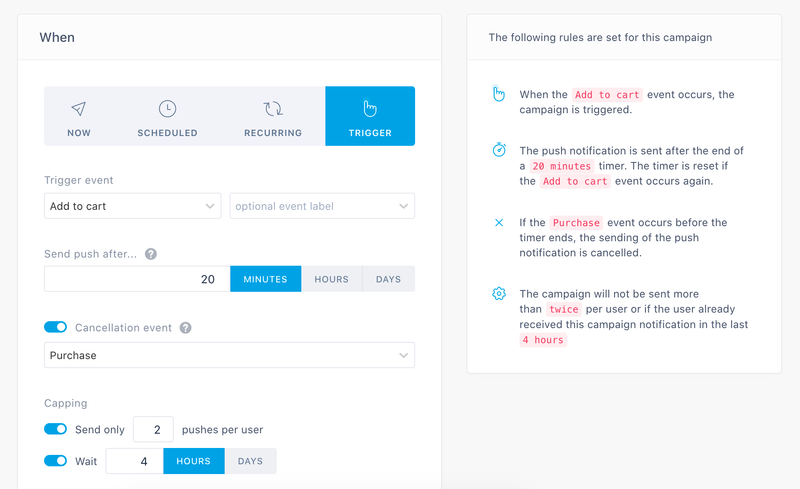
You can add one or several cancellation events. Users who trigger one of the cancellation events before the push is sent will exit the user journey and won't receive the notification. You can use an event tagged in your app and apply filters based on additional event data too (Label, Attributes, Tag collection).
Frequency Capping / Grace Period
The frequency capping allows you to limit the maximum number of times an install with a token receives a notification. This is useful to avoid overwhelming your users with the same message.
Use the grace period to set a period of time in days or hours during which new trigger events will be dismissed after a notification has been sent to the same opt-in install. This is handy to avoid sending too many messages to users too close together.
Important note: If the multi-trigger mode is activated, the frequency capping and grace period settings will not be applied to the total number of notifications sent by the campaign. It will be applied individually to each user journey (e.g. trigger a maximum of 2 notifications with a minimum delay of 10h between each notifications, for each item added to the cart).
Start / End Date
You can schedule the start and the end date of your trigger campaign based on:
- Local time: Batch will take into account the timezone of your users to start/end the campaign.
- Global time: The campaign will start/end at a specific time (UTC) regardless of your users' timezone.
Multi-trigger mode
By default, if the user fires multiple times the trigger event of the campaign, the timer of the campaign will be reset.
You may want to parallelize journeys, and allow the user to trigger several times the same campaign. You can do that by activating the multi-trigger mode.
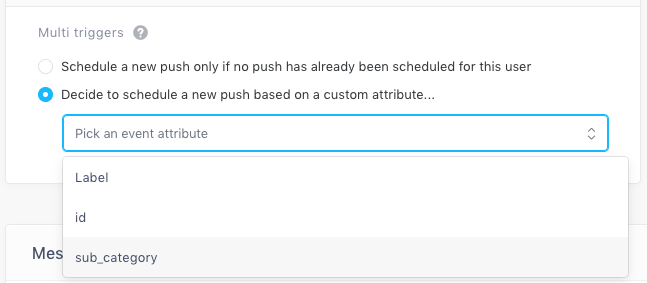
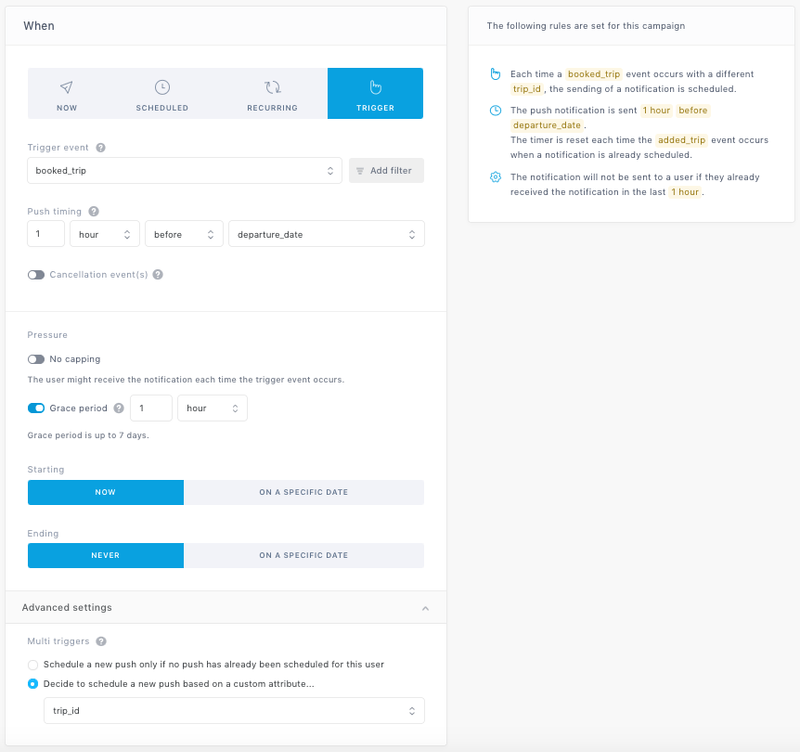
The multi-trigger mode allows you to schedule a push for each time the user fires the trigger event with a new ID (e.g. Trigger a push for each trip booked by the user on the app based on the trip ID). This ID must be one of the attributes attached to the event or the event label and can only be a String.
If the multi-trigger mode is activated, only cancellation events with the same ID as the trigger event can cancel the trigger.
Modifying a Running Trigger Campaign
Here is everything you need to know before modifying the targeting or the user journey of your trigger campaign.
Modifying the Trigger
Trigger event: Users who performed the trigger event before you modified it will remain in the waiting queue.
Cancellation event: The new cancellation event will be taken into account immediately, even for users who are already in the waiting queue.
Modifying the Timer
Increasing the Timer Duration: Batch will apply the new timer duration for users who are already in the waiting queue and for new users entering the user journey.
Decreasing the Timer Duration: Batch will only apply the new timer duration for new users entering the user journey. Users who were already in the waiting queue will receive a notification based on the previous timer duration.
Modifying the Targeting
Users will remain in the waiting queue even if you modify the targeting of your campaign. They will exit the user journey if they don't match anymore the targeting of the campaign once the timer is finished.
Modifying the Frequency Capping Limit
The new frequency capping limit will be applied immediately to users who enter the user journey.
Regarding users who already received several push notifications from your campaign, Batch will apply the new capping limit the next time they enter the user journey.
E.g. If your trigger campaign had a capping limit of 5 push notifications and you change it to 3, users who have already received 3 notifications and are currently in the user journey will receive one last notification.
The new frequency capping limit will be applied the next time they enter the user journey. They will not receive another notification from that campaign as they already reached the limit.
Using Trigger Campaigns
Trigger campaigns are useful to manage a wide range of use cases such as:
Onboarding Campaigns
Triggered a few minutes/hours after the first session of the user or up to 7 days later.
Make sure the first notification you send to your users is relevant and brings value to the user :
- If you have an e-commerce app, you can onboard your new users with a welcome promocode and/or direct them to the list of your most popular items.
- If you have a media app, you can direct them to the list of trending articles or invite them to test your premium subscription for free.
- You can also focus on important actions users need to take to fully enjoy your app and services: create an account, personalize their feed, etc.
Abandoned Cart Alerts
Trigger campaigns are handy to manage all your abandoned cart use cases. This applies perfectly to all your e-commerce use cases. E.g. alert users 30 minutes after they added an item and didn't place an order) and to a variety of other scenarios.
Following the same logic, you can use trigger campaigns to alert users who left the app while they were in the middle of something important:
- Medias: send a reminder to users who have checked your paywall but haven't subscribed yet.
- Finance/services: alert users who have left the app without validating a step of the account creation (e.g. document upload for identity confirmation, etc) or who were about to subscribe to a new product and haven't validated the subscription yet.
Check our third-party integrations to connect Batch to your analytics tool and track the revenue generated by your trigger campaigns (see more here).
Update Reminders
This can be done in two steps if you need to invite users to update to a major new version of your app (e.g. redesign, new features, breaking change or new subscription model).
Targeting: Add the app version condition in the targeting part of your campaign. In this case, we will use the app version attribute to target all users who are using a version anterior to version 1.18 of the app.

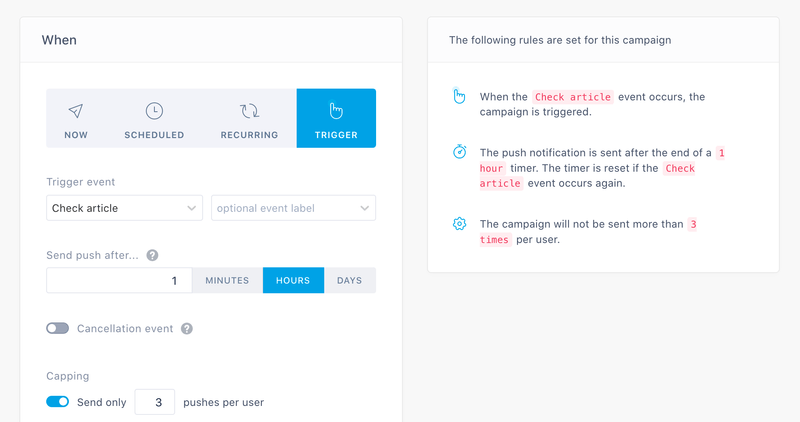
Scheduling: Pick an event that users should trigger in almost any session (e.g. read article, checked_item, etc).
Interest-based Campaigns
Using an In-App Campaign may be more appropriate to manage that kind of use cases, but you can also use a trigger campaign to recommend products and additional content to users based on their last action:
- Ecommerce: users who recently placed a purchase in your app are more likely to place a new one a short period later, especially if you push them an exclusive offer (e.g. free delivery, selected items, etc) of if you personalize the content of your notification (see more here).
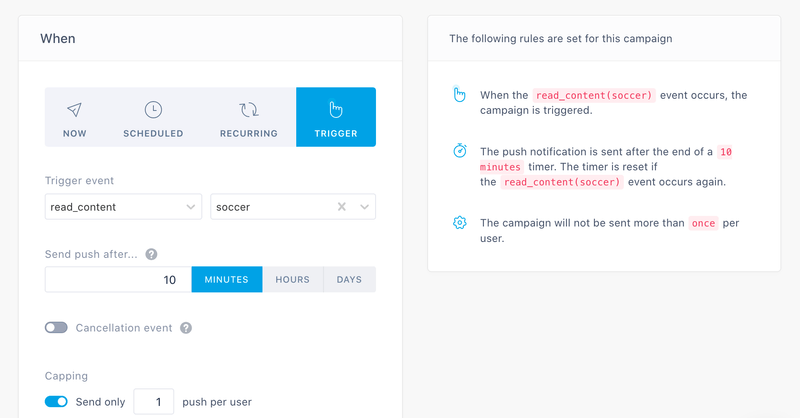
- Media: If your app offers thematic subscriptions, then you can push users who have recently read/watched content on a specific topic and offer them to subscribe. Here is how you could set up your campaign.
Scheduled reminders
You can use trigger campaigns to remind your users of important information related to an upcoming event. E.g. Alert users 24 hours before and upcoming trip they booked on your app.
The trip_id received with every event in this example will act as a deduplication id. This means users will receive as many reminders as they booked trips, not only for the last one they booked.
Using a similar logic, you can schedule a notification after an important event. E.g. Share a satisfaction survey 3 days after a user's checkout date.
Troubleshooting
There are several points you should also check if specific users never received the notification they were supposed to receive from a trigger campaign:
- Debug tool: Use the debug tool to see why a specific install didn't receive a push notification from a trigger campaign:
- Trigger: Make sure the event used in the campaign is triggered correctly in your app. Otherwise, some users will not be able to enter or exit the user journey set in your campaign. You can use the debug tool to run some tests (know more here).
- Opt-in status: On iOS, users may not have turned on yet push notifications when Batch triggers the notification. This may happen with most of your onboarding campaigns. Use the debug tool to check the opt-in state of a specific install.
- App in foreground: If you set a timer in minutes, users may still be in the app when Batch triggers the notification. The notification will not be displayed on iOS if the app is in the foreground, except if you added support for that feature (know more). On Android, an icon will appear in the status bar if users have the app opened in the foreground.
You will find a detailed troubleshooting method here if you want to further investigate: iOS/Android.
