Adding the JavaScript snippet to your page
Standard setup
The snippet below allows you to:
- Respect best practices regarding collect on Mozilla Firefox and Chromium based browsers,
- Personalize custom alert message and buttons
It does not include the Safari setup object, which will be automatically generated on the dashboard depending on your configuration.
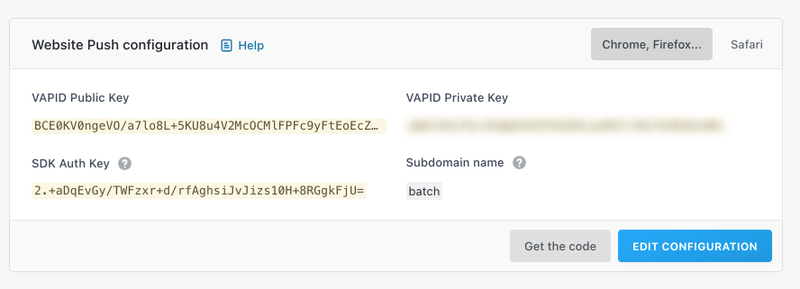
To get a personalized tag, including your own setup information (as API keys or safari set-up object), click on the Get the code button (⚙️ Settings → Push settings → Website Push configuration).
<script type="text/javascript">
(function(b,a,t,c,h,e,r){h='batchSDK';b[h]=b[h]||function() {
  (b[h].q=b[h].q||[]).push(arguments)};e=a.createElement(t),r=a.getElementsByTagName(t)[0];
  e.async=1;e.src=c;r.parentNode.insertBefore(e,r);})(window,document,'script','https://via.batch.com/v4/bootstrap.min.js');

  var batchSDKUIConfig = { // refer to the documentation to learn more https://batch.com/doc/web/ui-components.html
    native: {}
  }

  // Firefox and Safari specific configuration
  if ((navigator.userAgent.indexOf("Firefox") !== -1 || (navigator.userAgent.indexOf("Safari") !== -1) &&
navigator.userAgent.indexOf("Chrome") === -1))  {
    batchSDKUIConfig = {
      alert: {
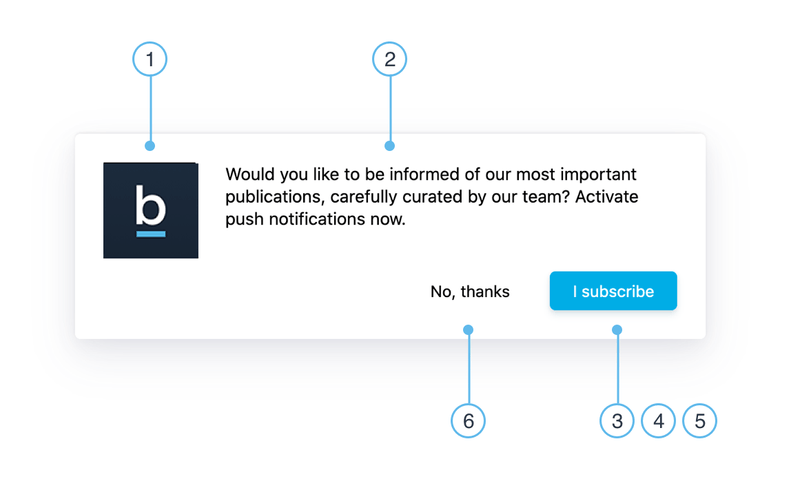
        text: 'Subscribe to push notifications', //TODO 🔶 [1] Update to contextualize subscription request
        positiveBtnStyle: {
          "backgroundColor":'[COLOR IN HEXADECIMAL]',// TODO 🔶 [2] update backgroundColor value
          "hoverBackgroundColor": '[COLOR IN HEXADECIMAL]'// TODO 🔶 [3] update hoverBackgroundColor value
          },
          positiveSubBtnLabel: 'I subscribe!',// TODO 🔶 [4] update positiveSubBtnLabel value
          negativeBtnLabel: 'No, thanks'// TODO 🔶 [5] update negativeBtnLabel value
          }
      }
  }
  // end Firefox and Safari specific configuration

  batchSDK('setup', {
    apiKey: '',  // TODO 🔶: Use the SDK API Key of your website (see Settings section of your dashboard)
    subdomain: '', // TODO 🔶: Use the Subdomain name of your website (see Settings section of your dashboard, do not include the ".via.batch.com" part)
    authKey: '', // TODO 🔶: Use the SDK Auth Key of your app (see Settings section of your dashboard)
    dev: true, // remove this for prod
    vapidPublicKey: '', // TODO 🔶: Use the vapidPublicKey of your website (see Settings section of your dashboard)
    ui: batchSDKUIConfig,
    // Add the generated Safari object here if applicable
  });
</script>
Custom alert setup details
Using the snippet above, the custom alert will only be displayed on Mozilla Firefox and Safari on MacOS. The native opt-in request will be displayed on other browsers.
See more customization options here.
Where to implement the JavaScript snippet?
Optimize performance
The tag should be implemented at the end of the body, so it doesn't block any other script.
Note that browsers directly manage the download and installation of the service worker asynchronously so it doesn't affect performance.
Trigger the subscription request at the right moment
In most cases, the JavaScript tag should be implemented on every page of your website that belong to the same domain. It allows users to be exposed to the opt-in request regardless of the origin of the traffic (organic, newsletter...). Alternatively, you can also choose to scenarize the opt-in request, after users perform a specific action.
Domains and subdomains management
Usually, the JavaScript tag should only deployed on your main domain (no other domain or subdomain) to eliminate risks of duplicate notifications.
If you want to integrate Batch on several domains or subdomains, check the dedicated section of the documentation Domains and subdomains management.
Reach out to our team if you have any question regarding the best integration for your goals.

